Sandbox APIs
What is the Sandbox App?
To simplify the integration process for developers working with the Upstox APIs, we have developed a sandbox environment that closely emulates the actual API integration experience. This setup allows developers to fully integrate and test their applications end-to-end on the payload before even connecting to the live market. In the sandbox, you can test strategies and integrations comprehensively without incurring any costs and without any time restrictions, unlike the live system which operates only during defined periods.
In simple terms, using the sandbox APIs ensures that you have thoroughly tested all your code and its interactions within the API before executing actual orders in the live market.
We will be rolling out the sandbox feature in a phased manner, so it is advisable to check the documentation regularly for updates on the availability of additional sandbox APIs.
Create a Sandbox App and Generate a Token
Follow these steps to set up a sandbox app and generate an access token for API execution:
Access the Sandbox Section - Visit the Upstox Developer Apps page to view the sandbox section. Here, you can manage your app and token.
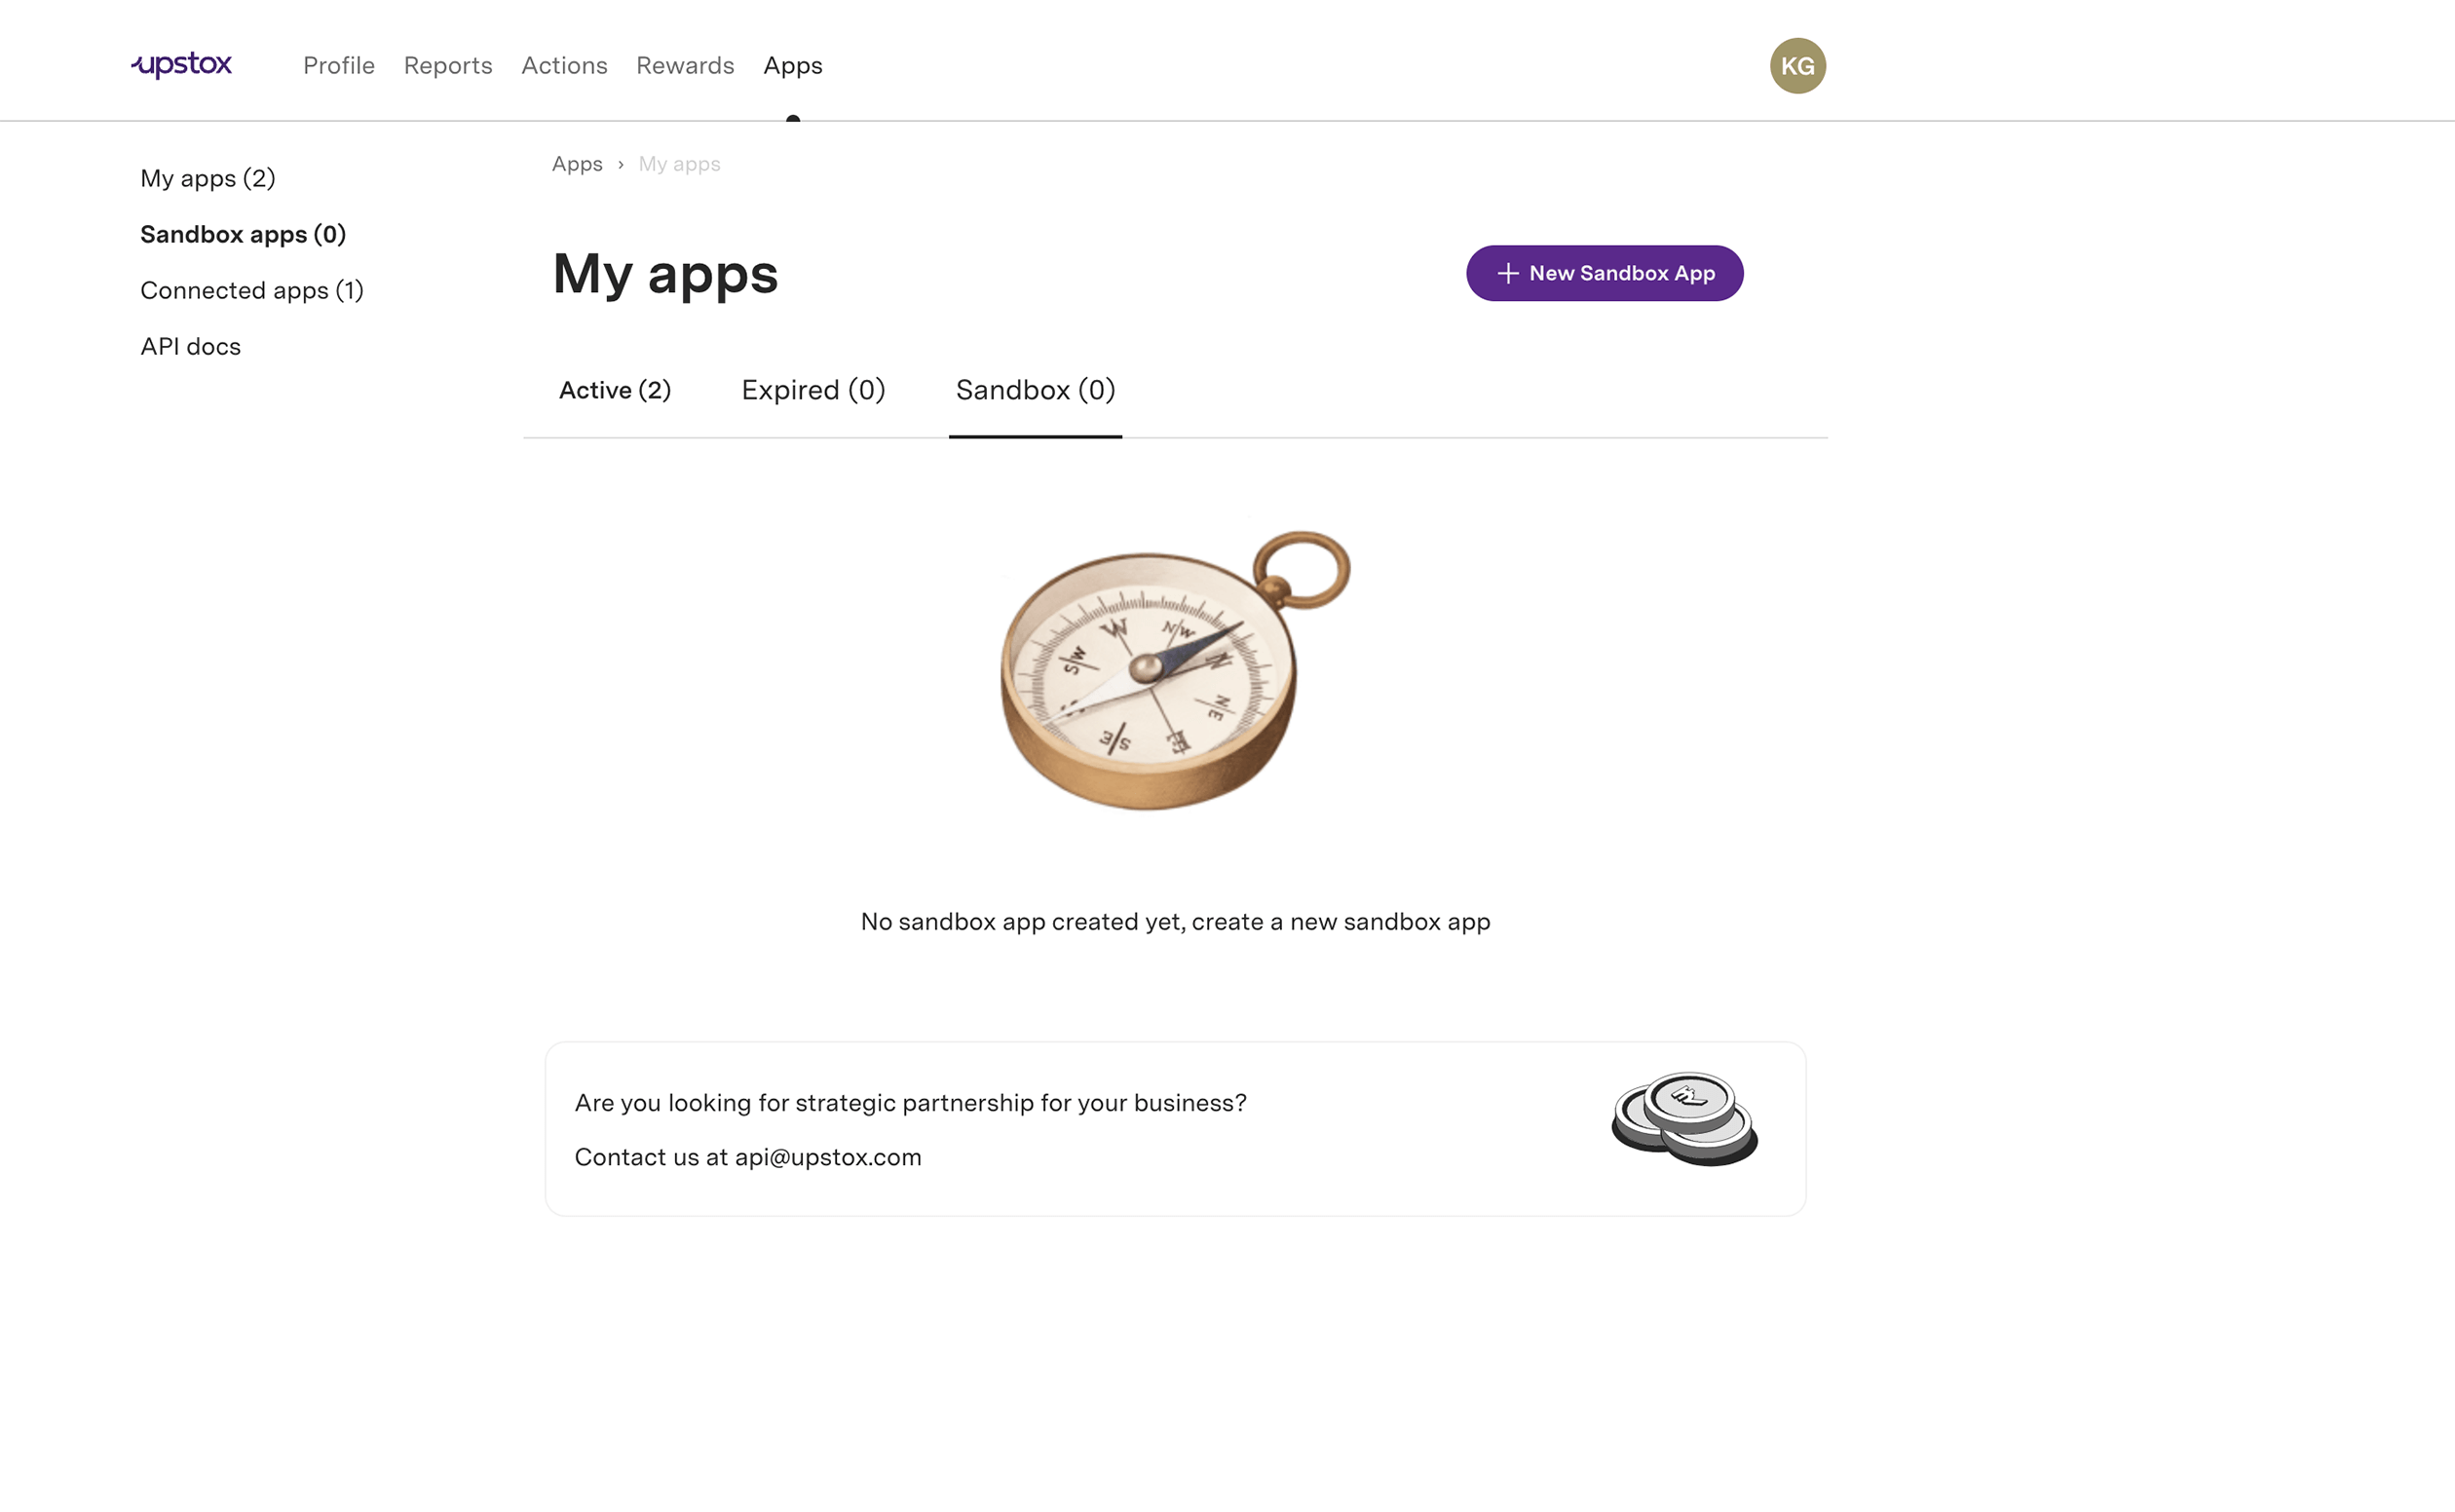
Start the App Creation Process - Click the New Sandbox App button to open the application form. This form will allow you to specify the details of your new sandbox app. Note that the redirect URL and postback URL fields are included to collect data and currently do not serve any functional purpose for the sandbox app. These fields are mandatory for the live app and will soon mimic their functionality in the sandbox environment as well. We recommend filling out these URLs now to avoid having to update this information when the feature is fully implemented in the sandbox.
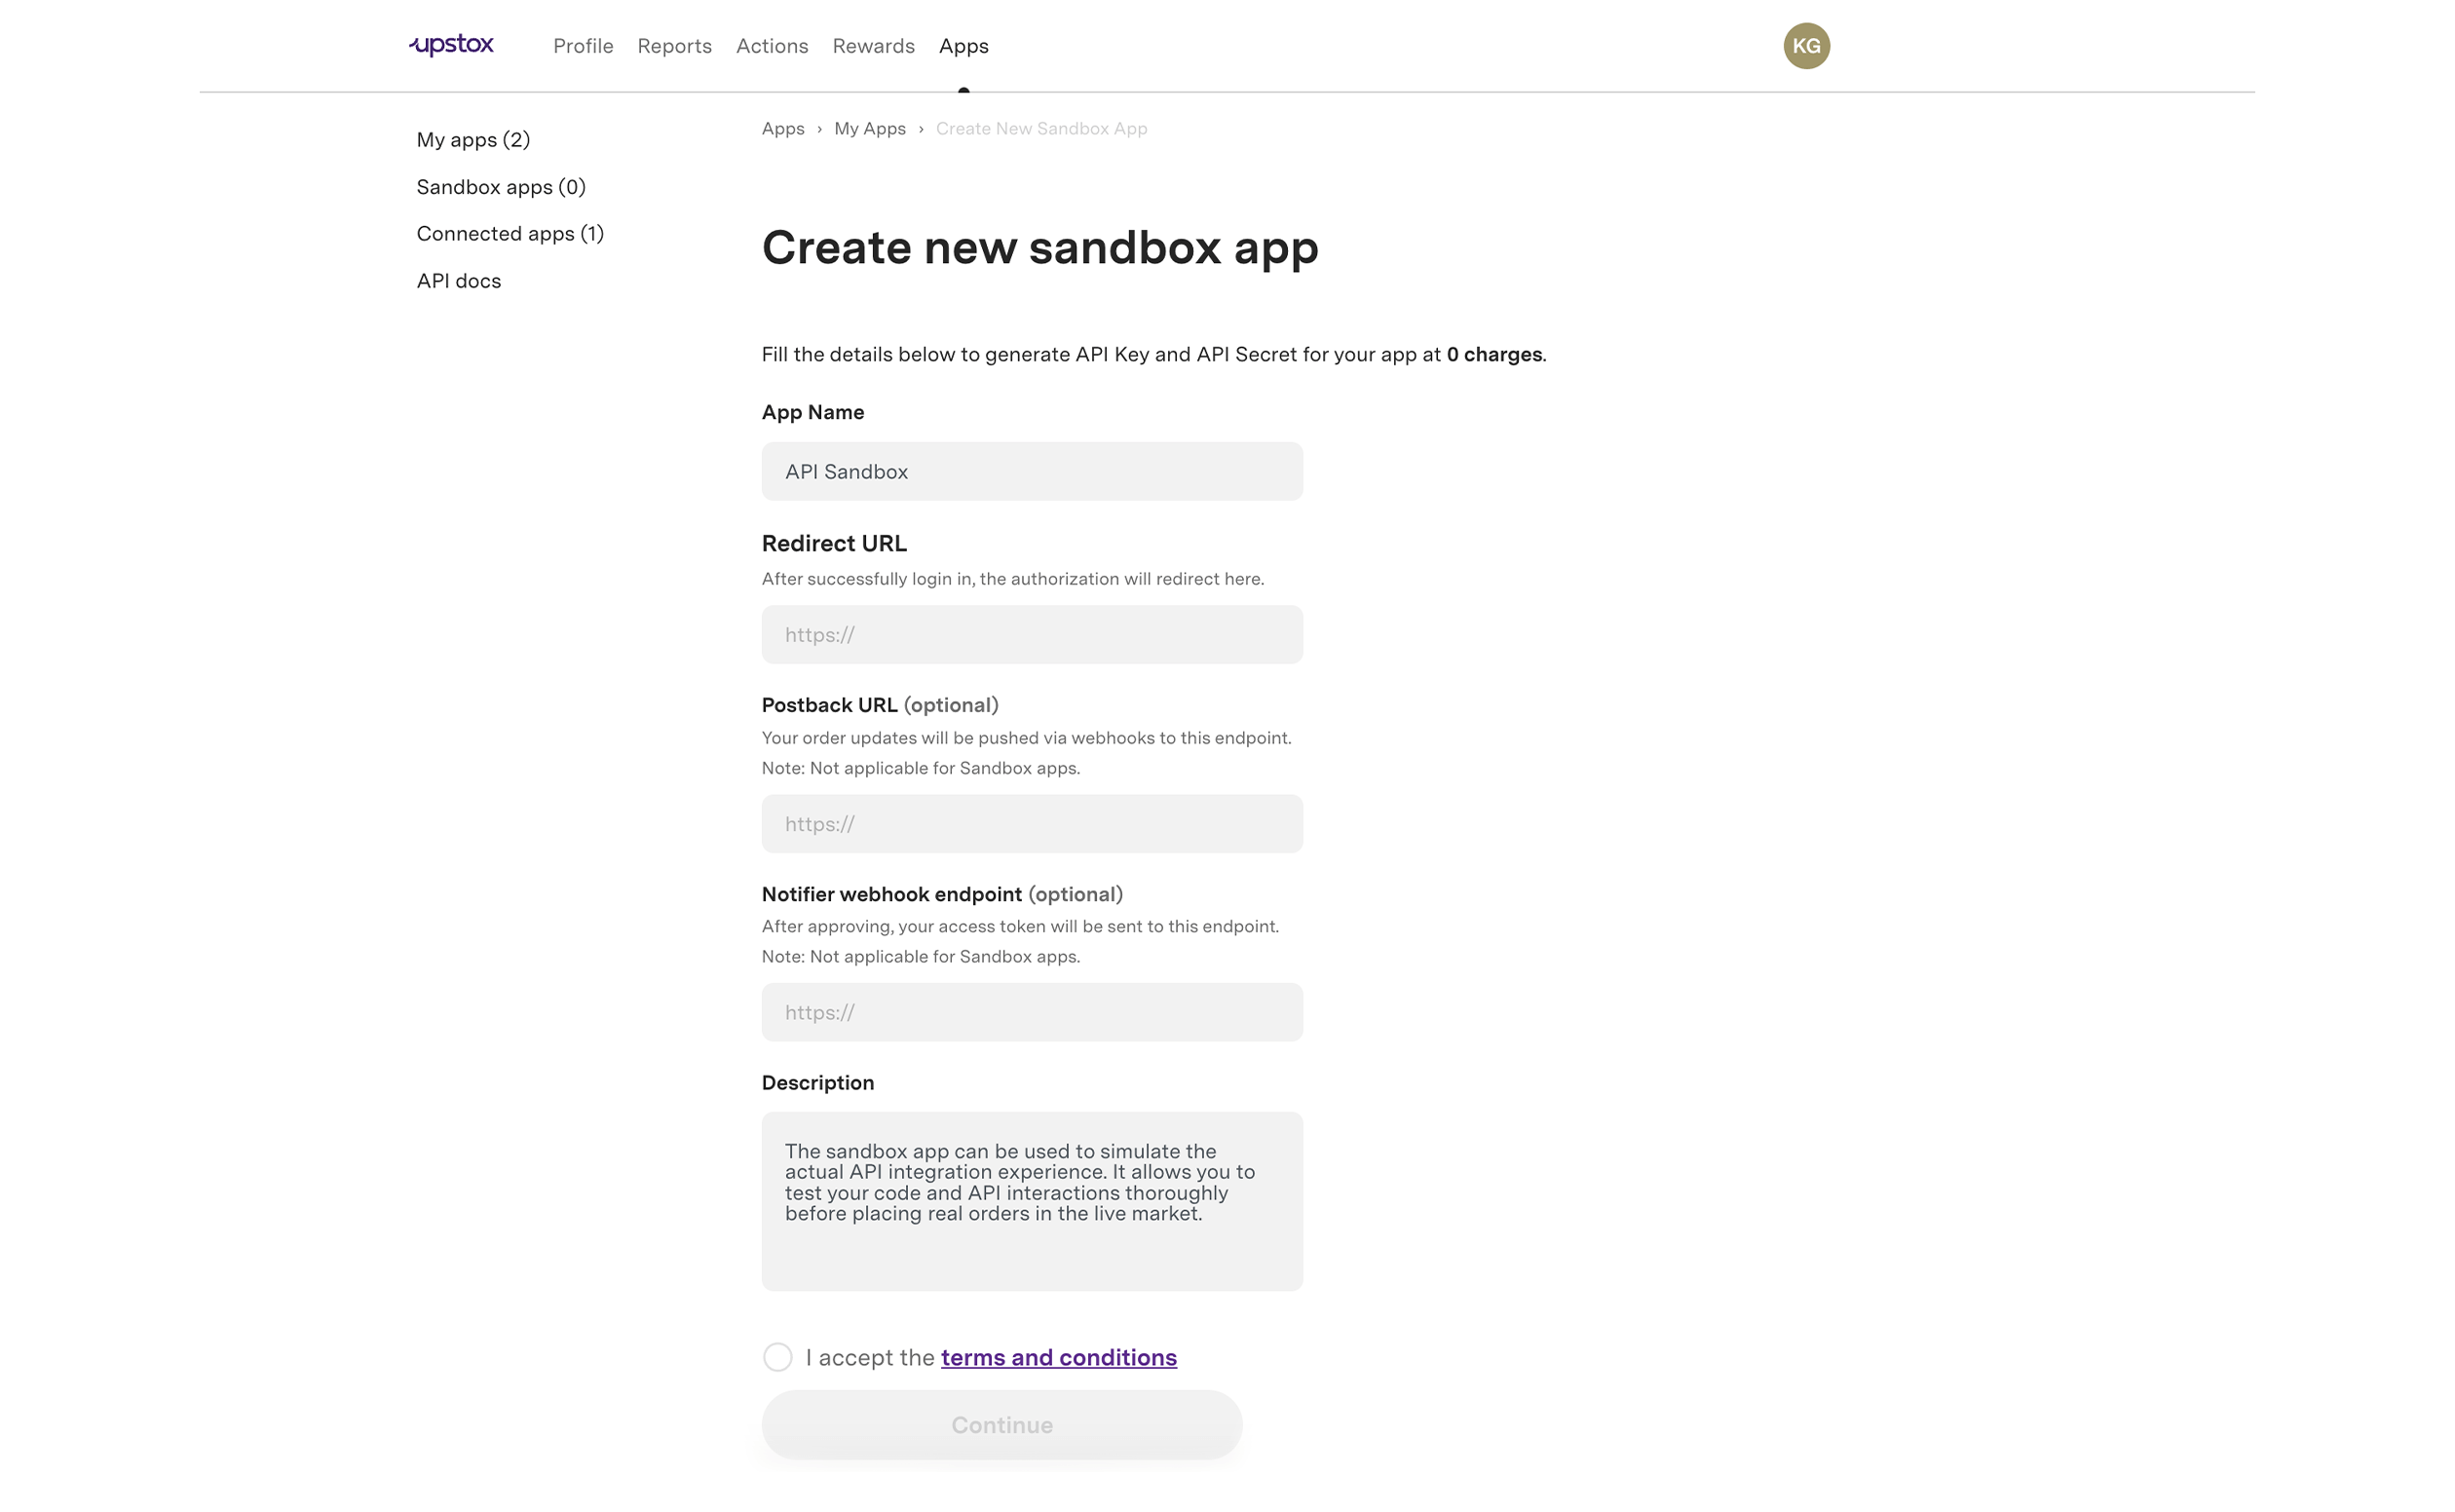
Complete the App Form - Fill in the required fields in the form to define your sandbox app’s settings and features. After entering the information, click Continue to create your new sandbox app.
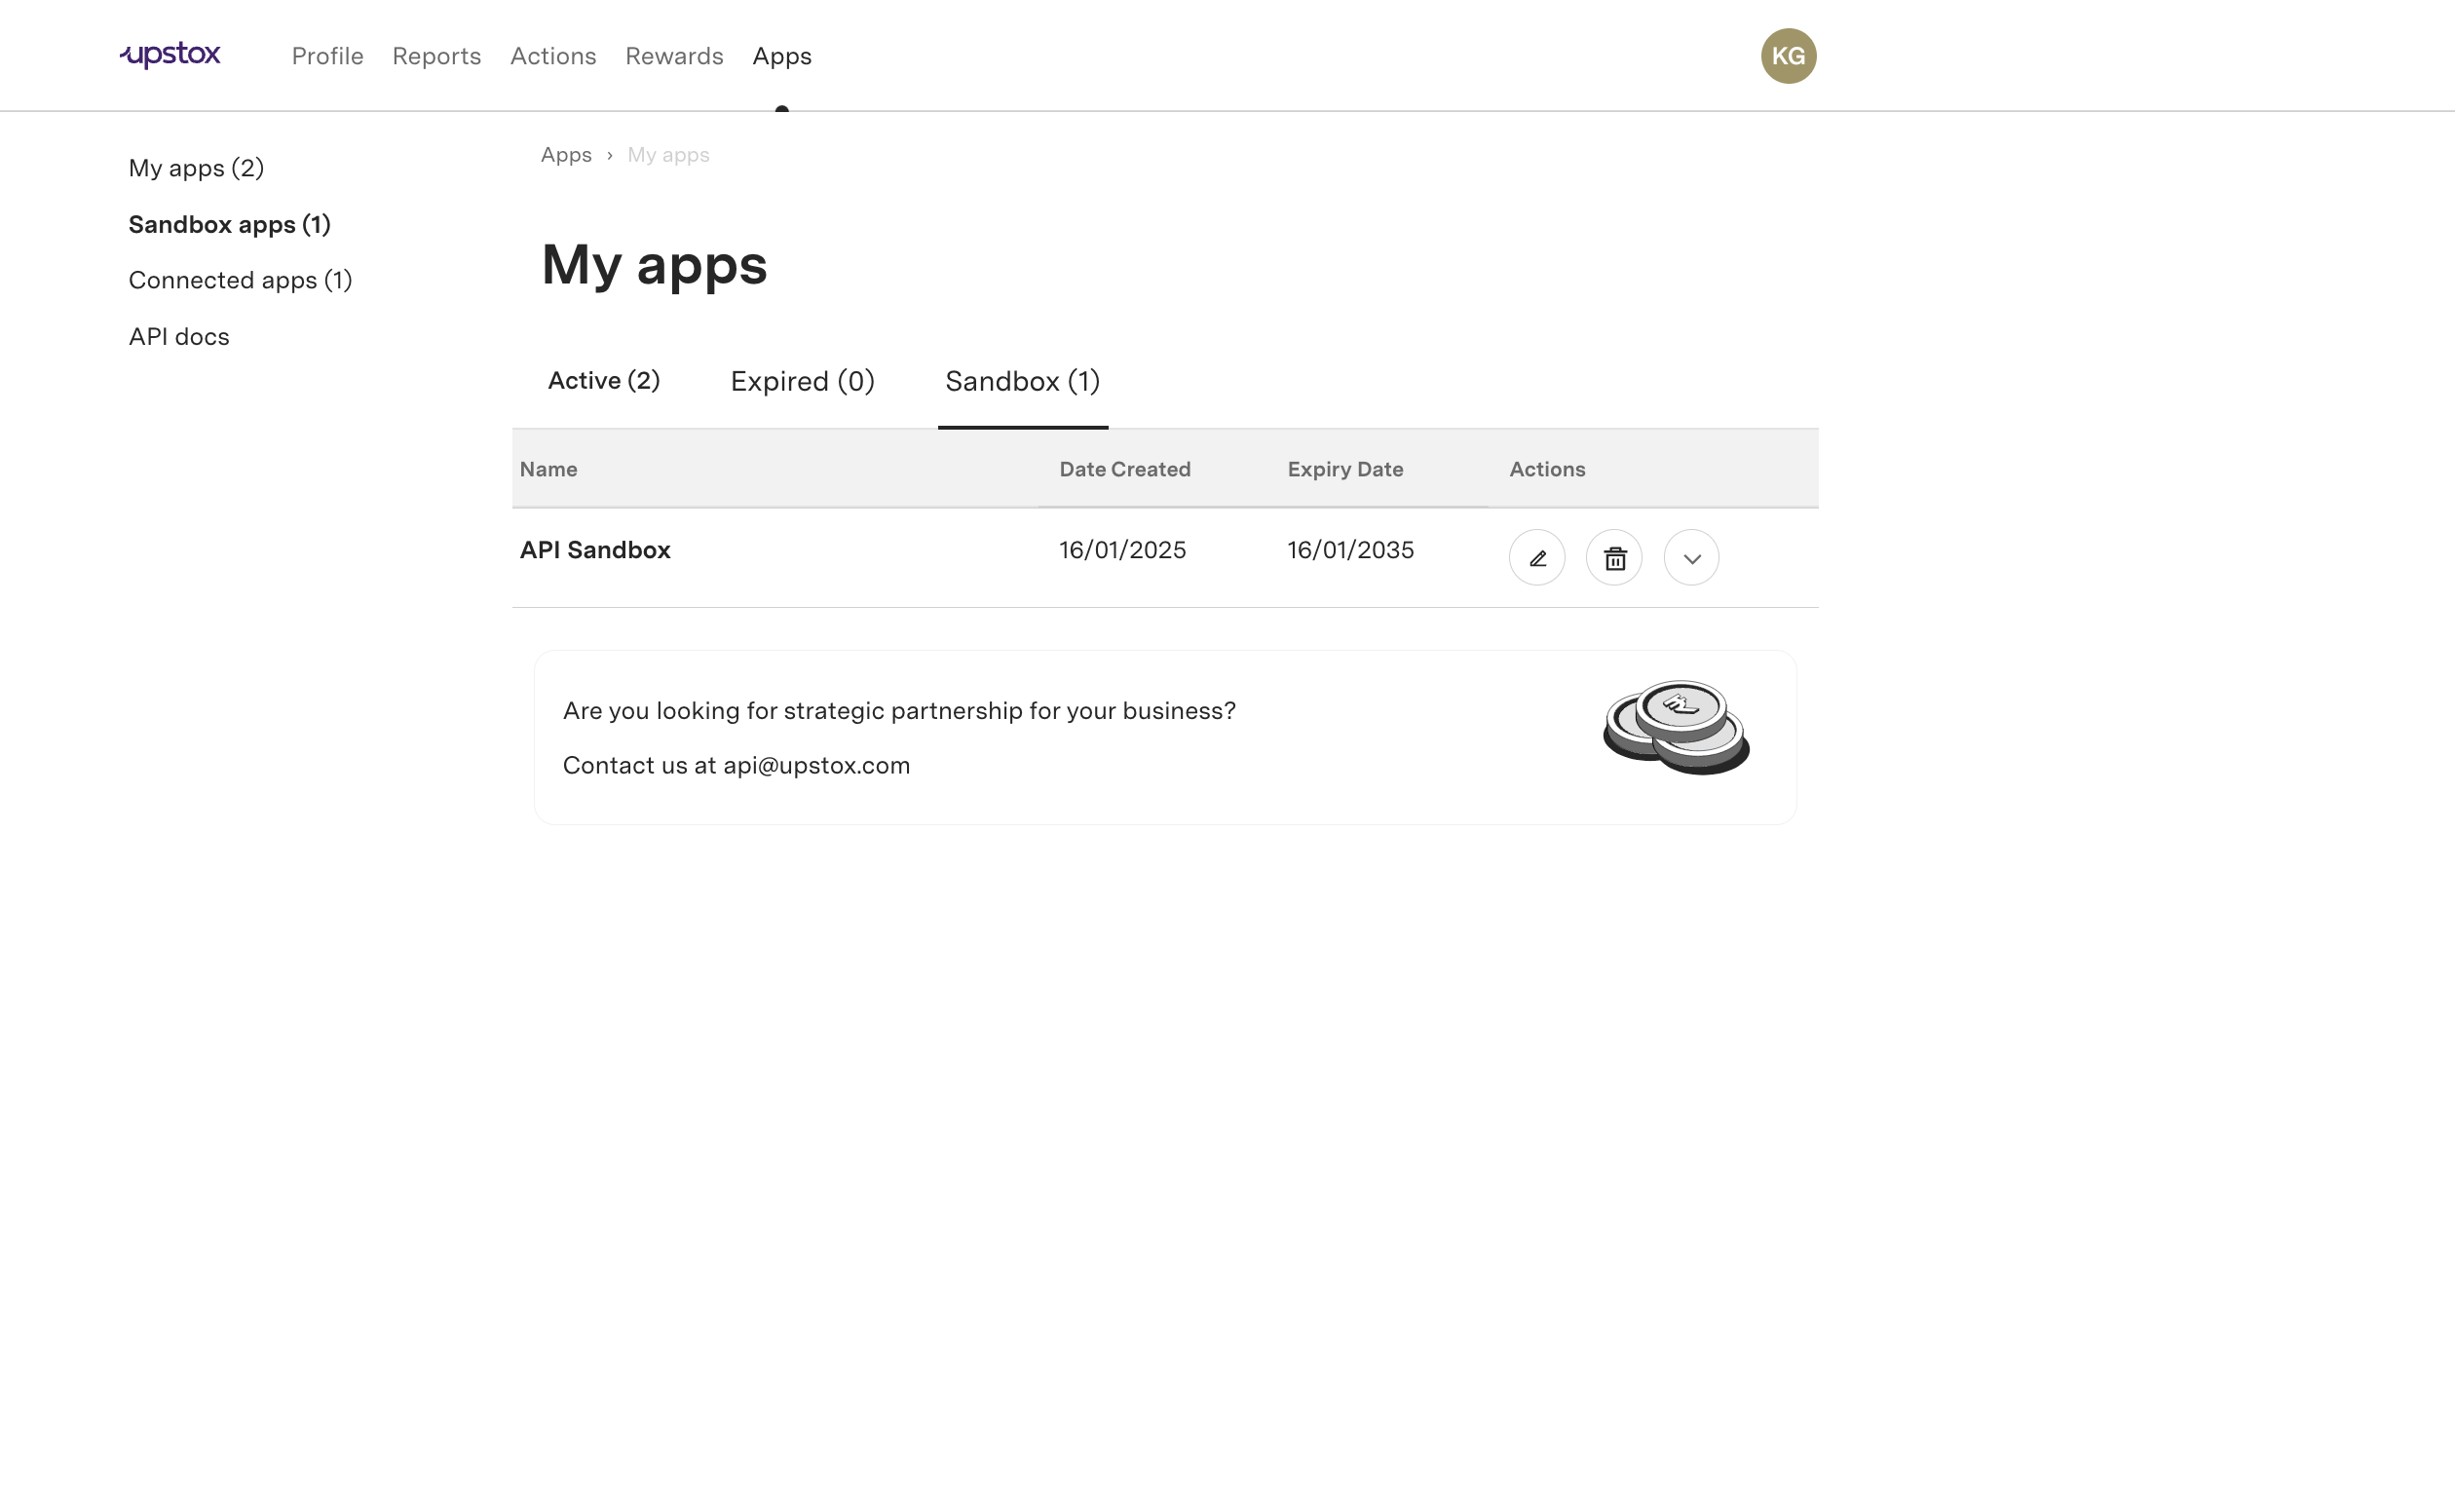
Generate Your Access Token - Navigate to your newly created sandbox app, and click the Generate button. This will create a new access token that you can use to authenticate API requests.
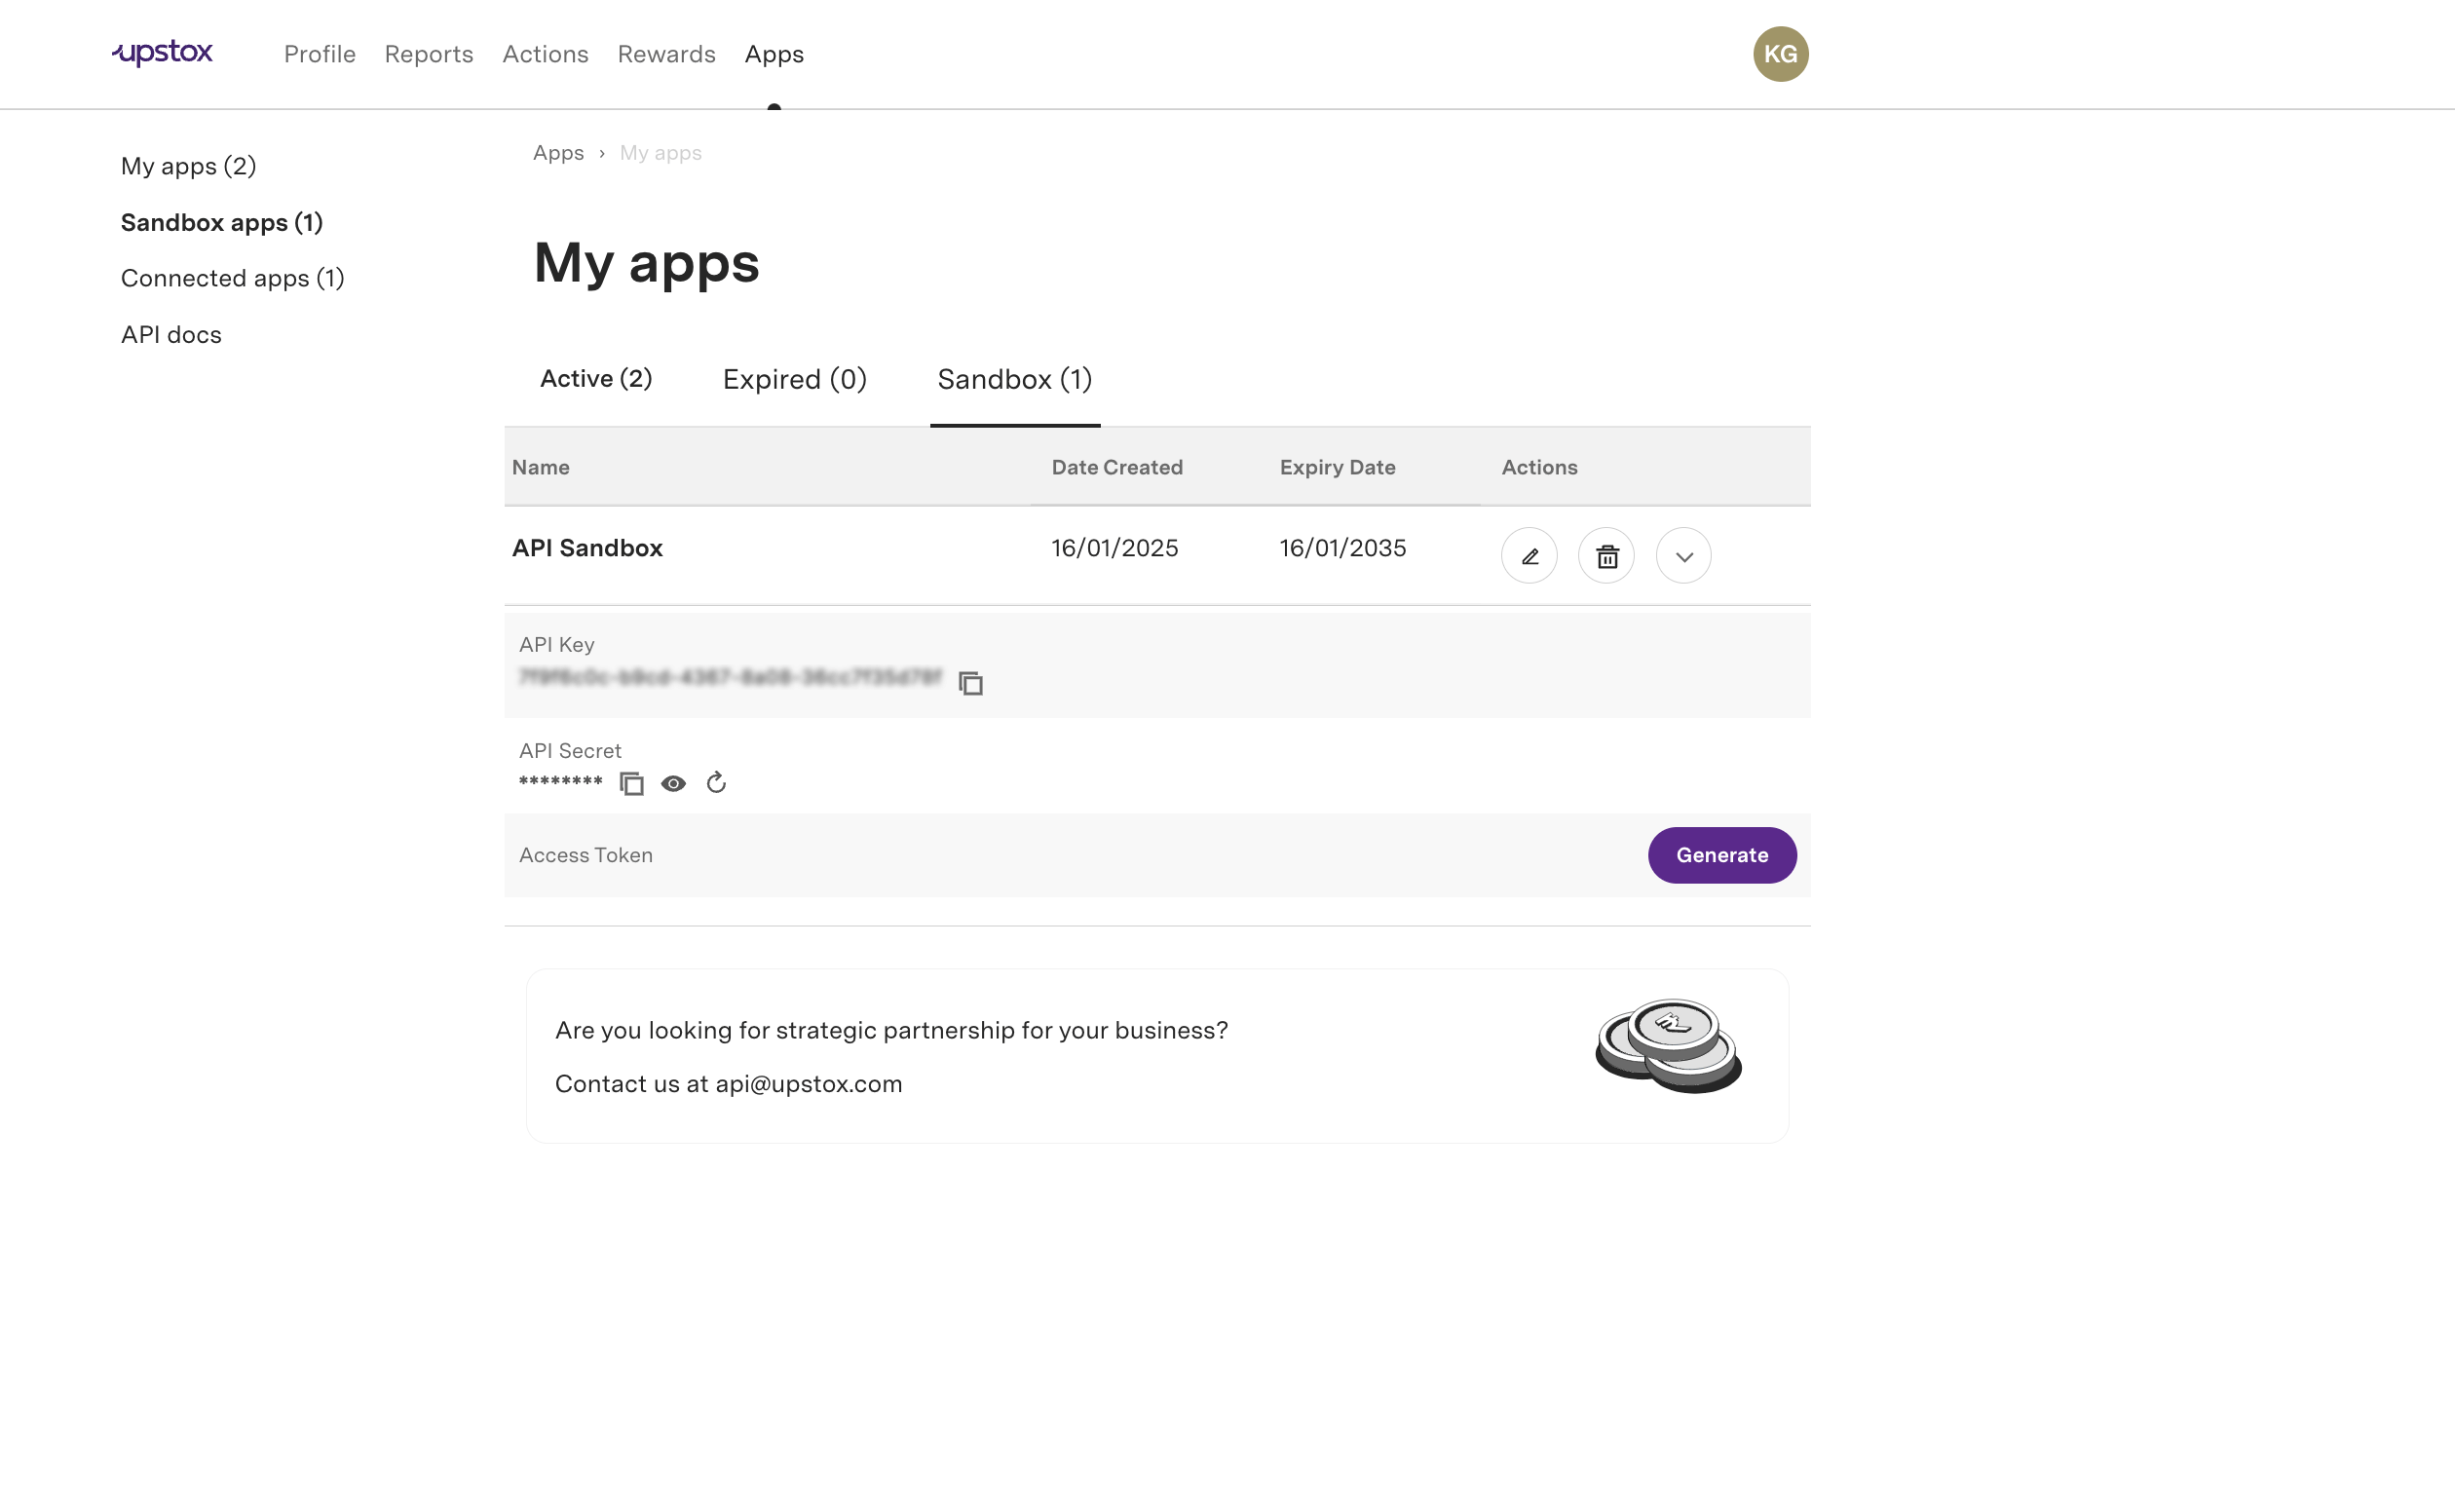
Copy Your Access Token - Once the token is generated, it will be displayed on the screen. Copy this token, which will be valid for 30 days, for use in your sandbox API executions.
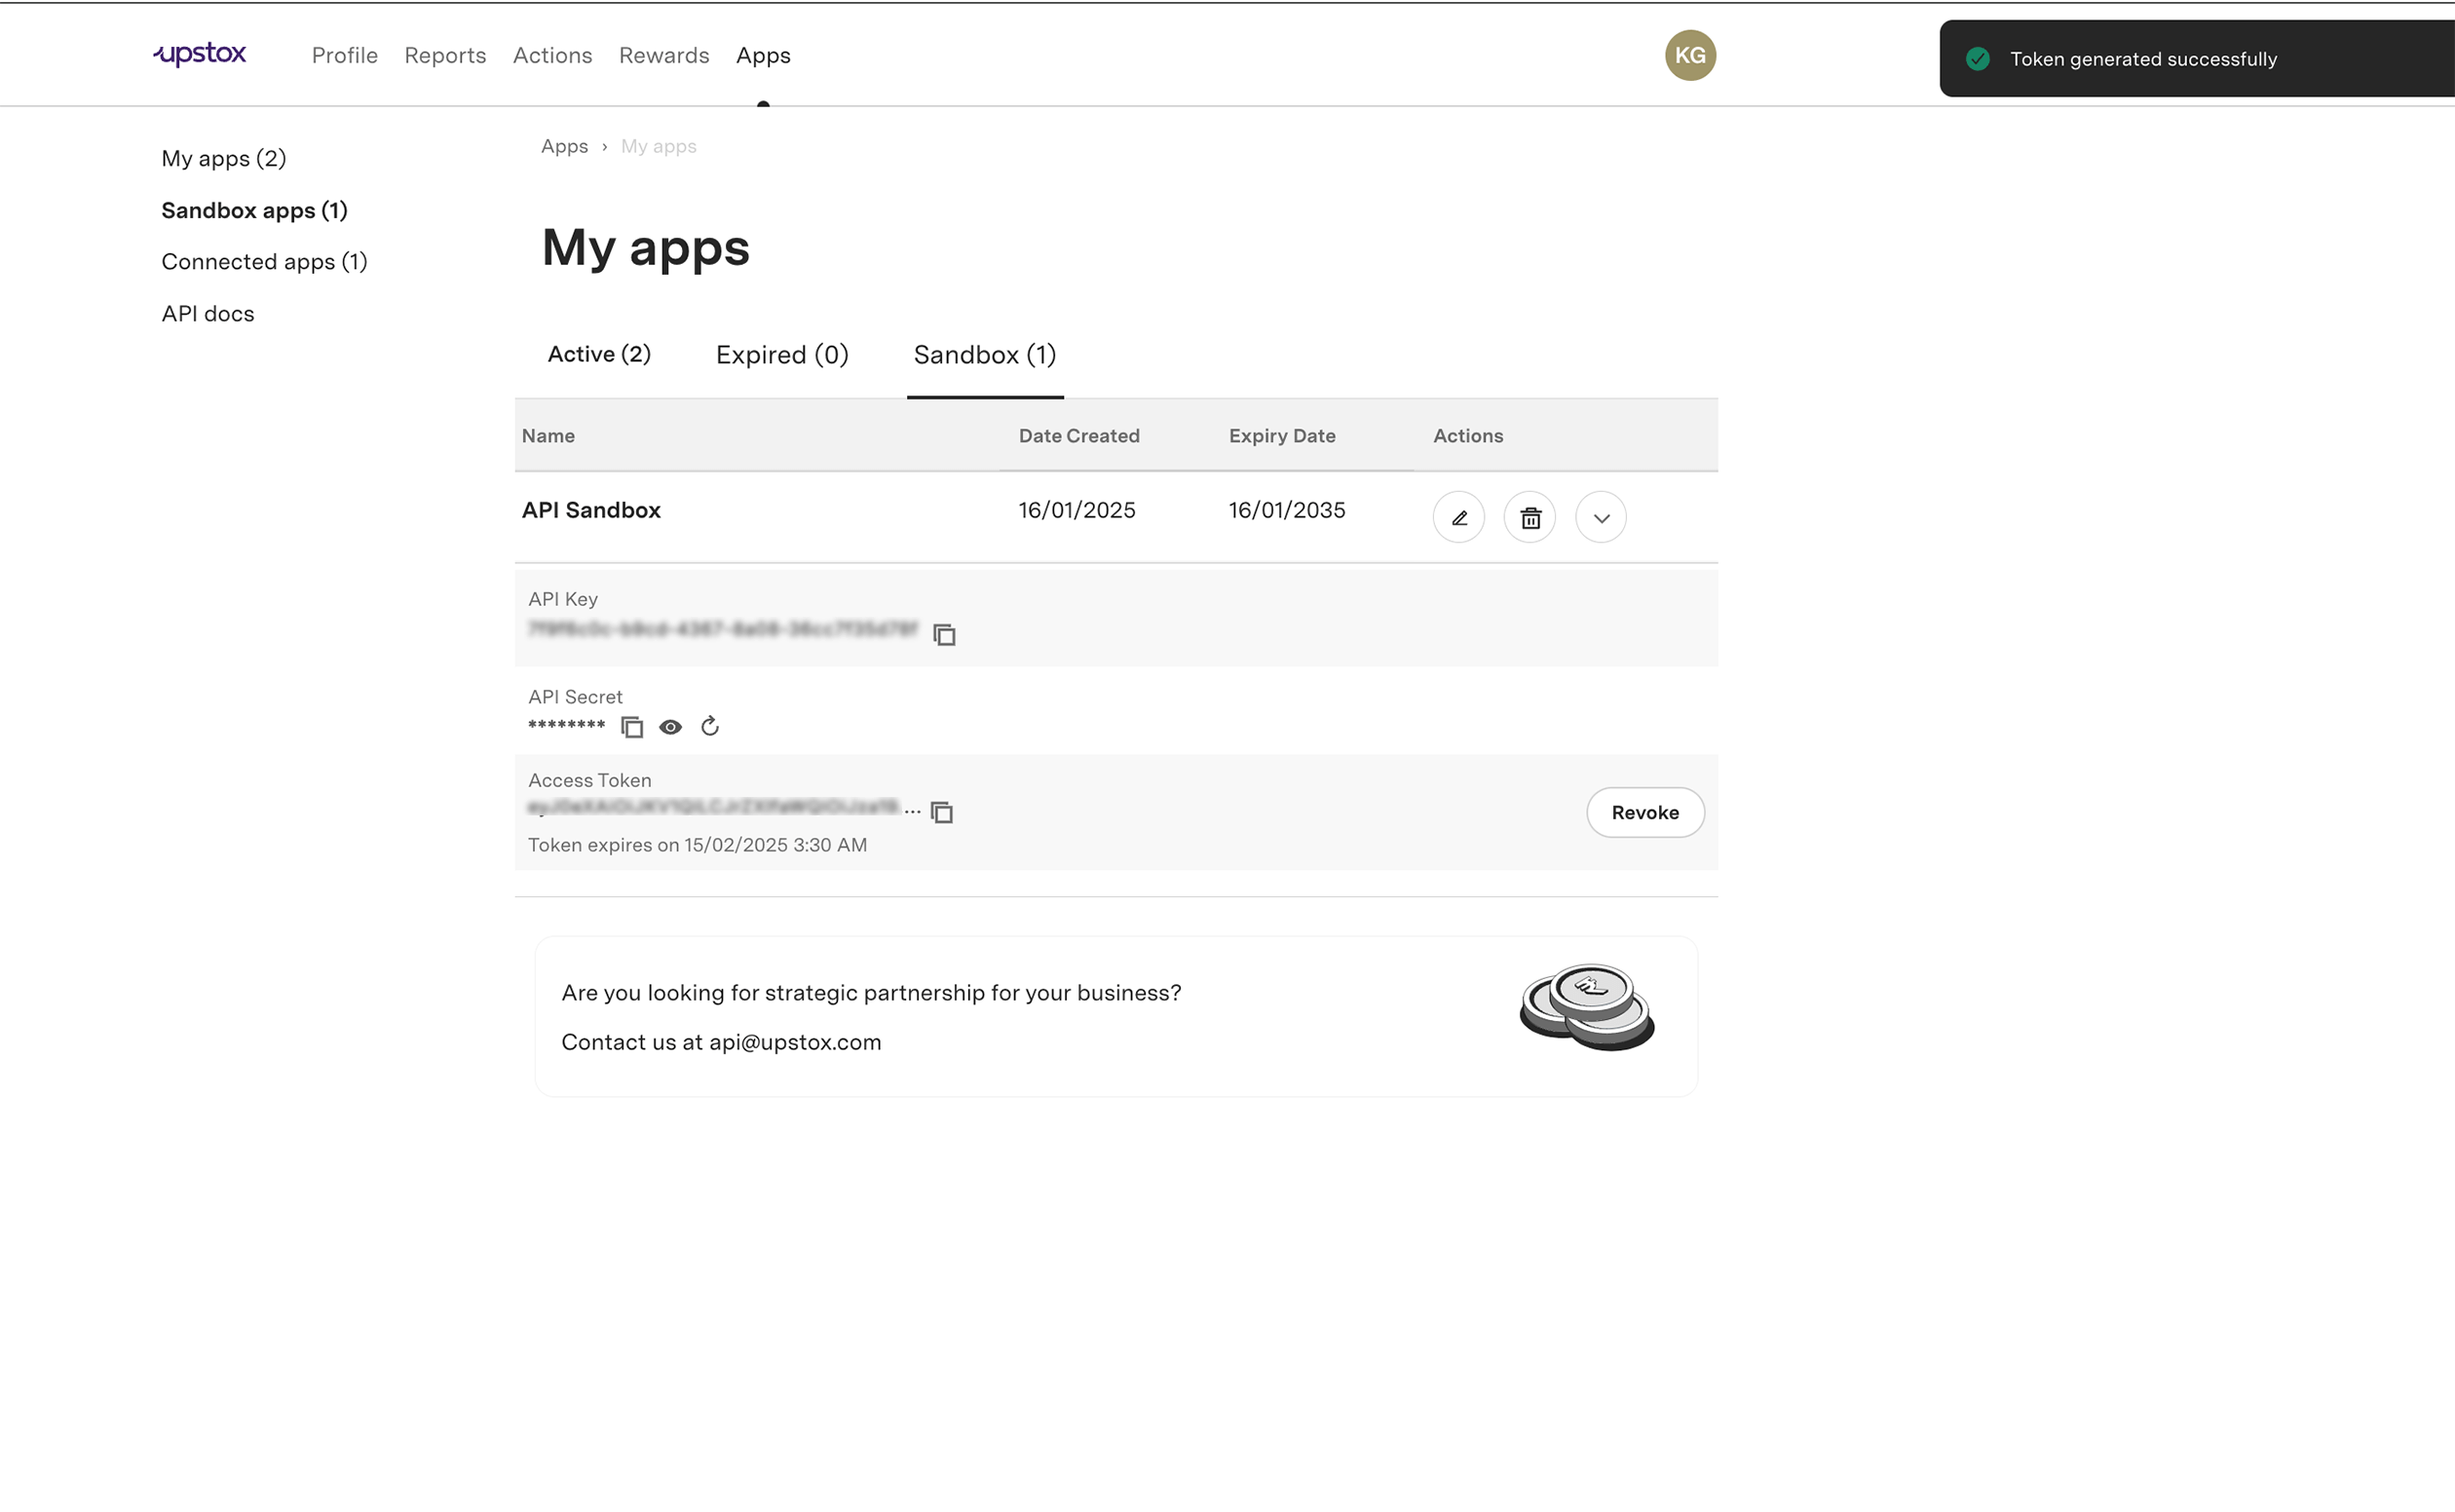
- Only one sandbox app is permitted per user, ensuring focused and manageable testing environments.
- Sandbox access tokens are exclusively for sandbox orders and cannot be used for live transactions.
Identifying APIs with Sandbox Capability
This section will guide you on how to identify APIs that have the sandbox feature enabled in the API documentation. As we progress towards making all APIs sandbox capable, the 'Sandbox enabled' flag will eventually be phased out. For now, here's how to spot and utilize APIs with sandbox capabilities from the documentation:
Look for the Sandbox Flag - An API with sandbox capabilities will display a 'Sandbox enabled' flag next to the page title.

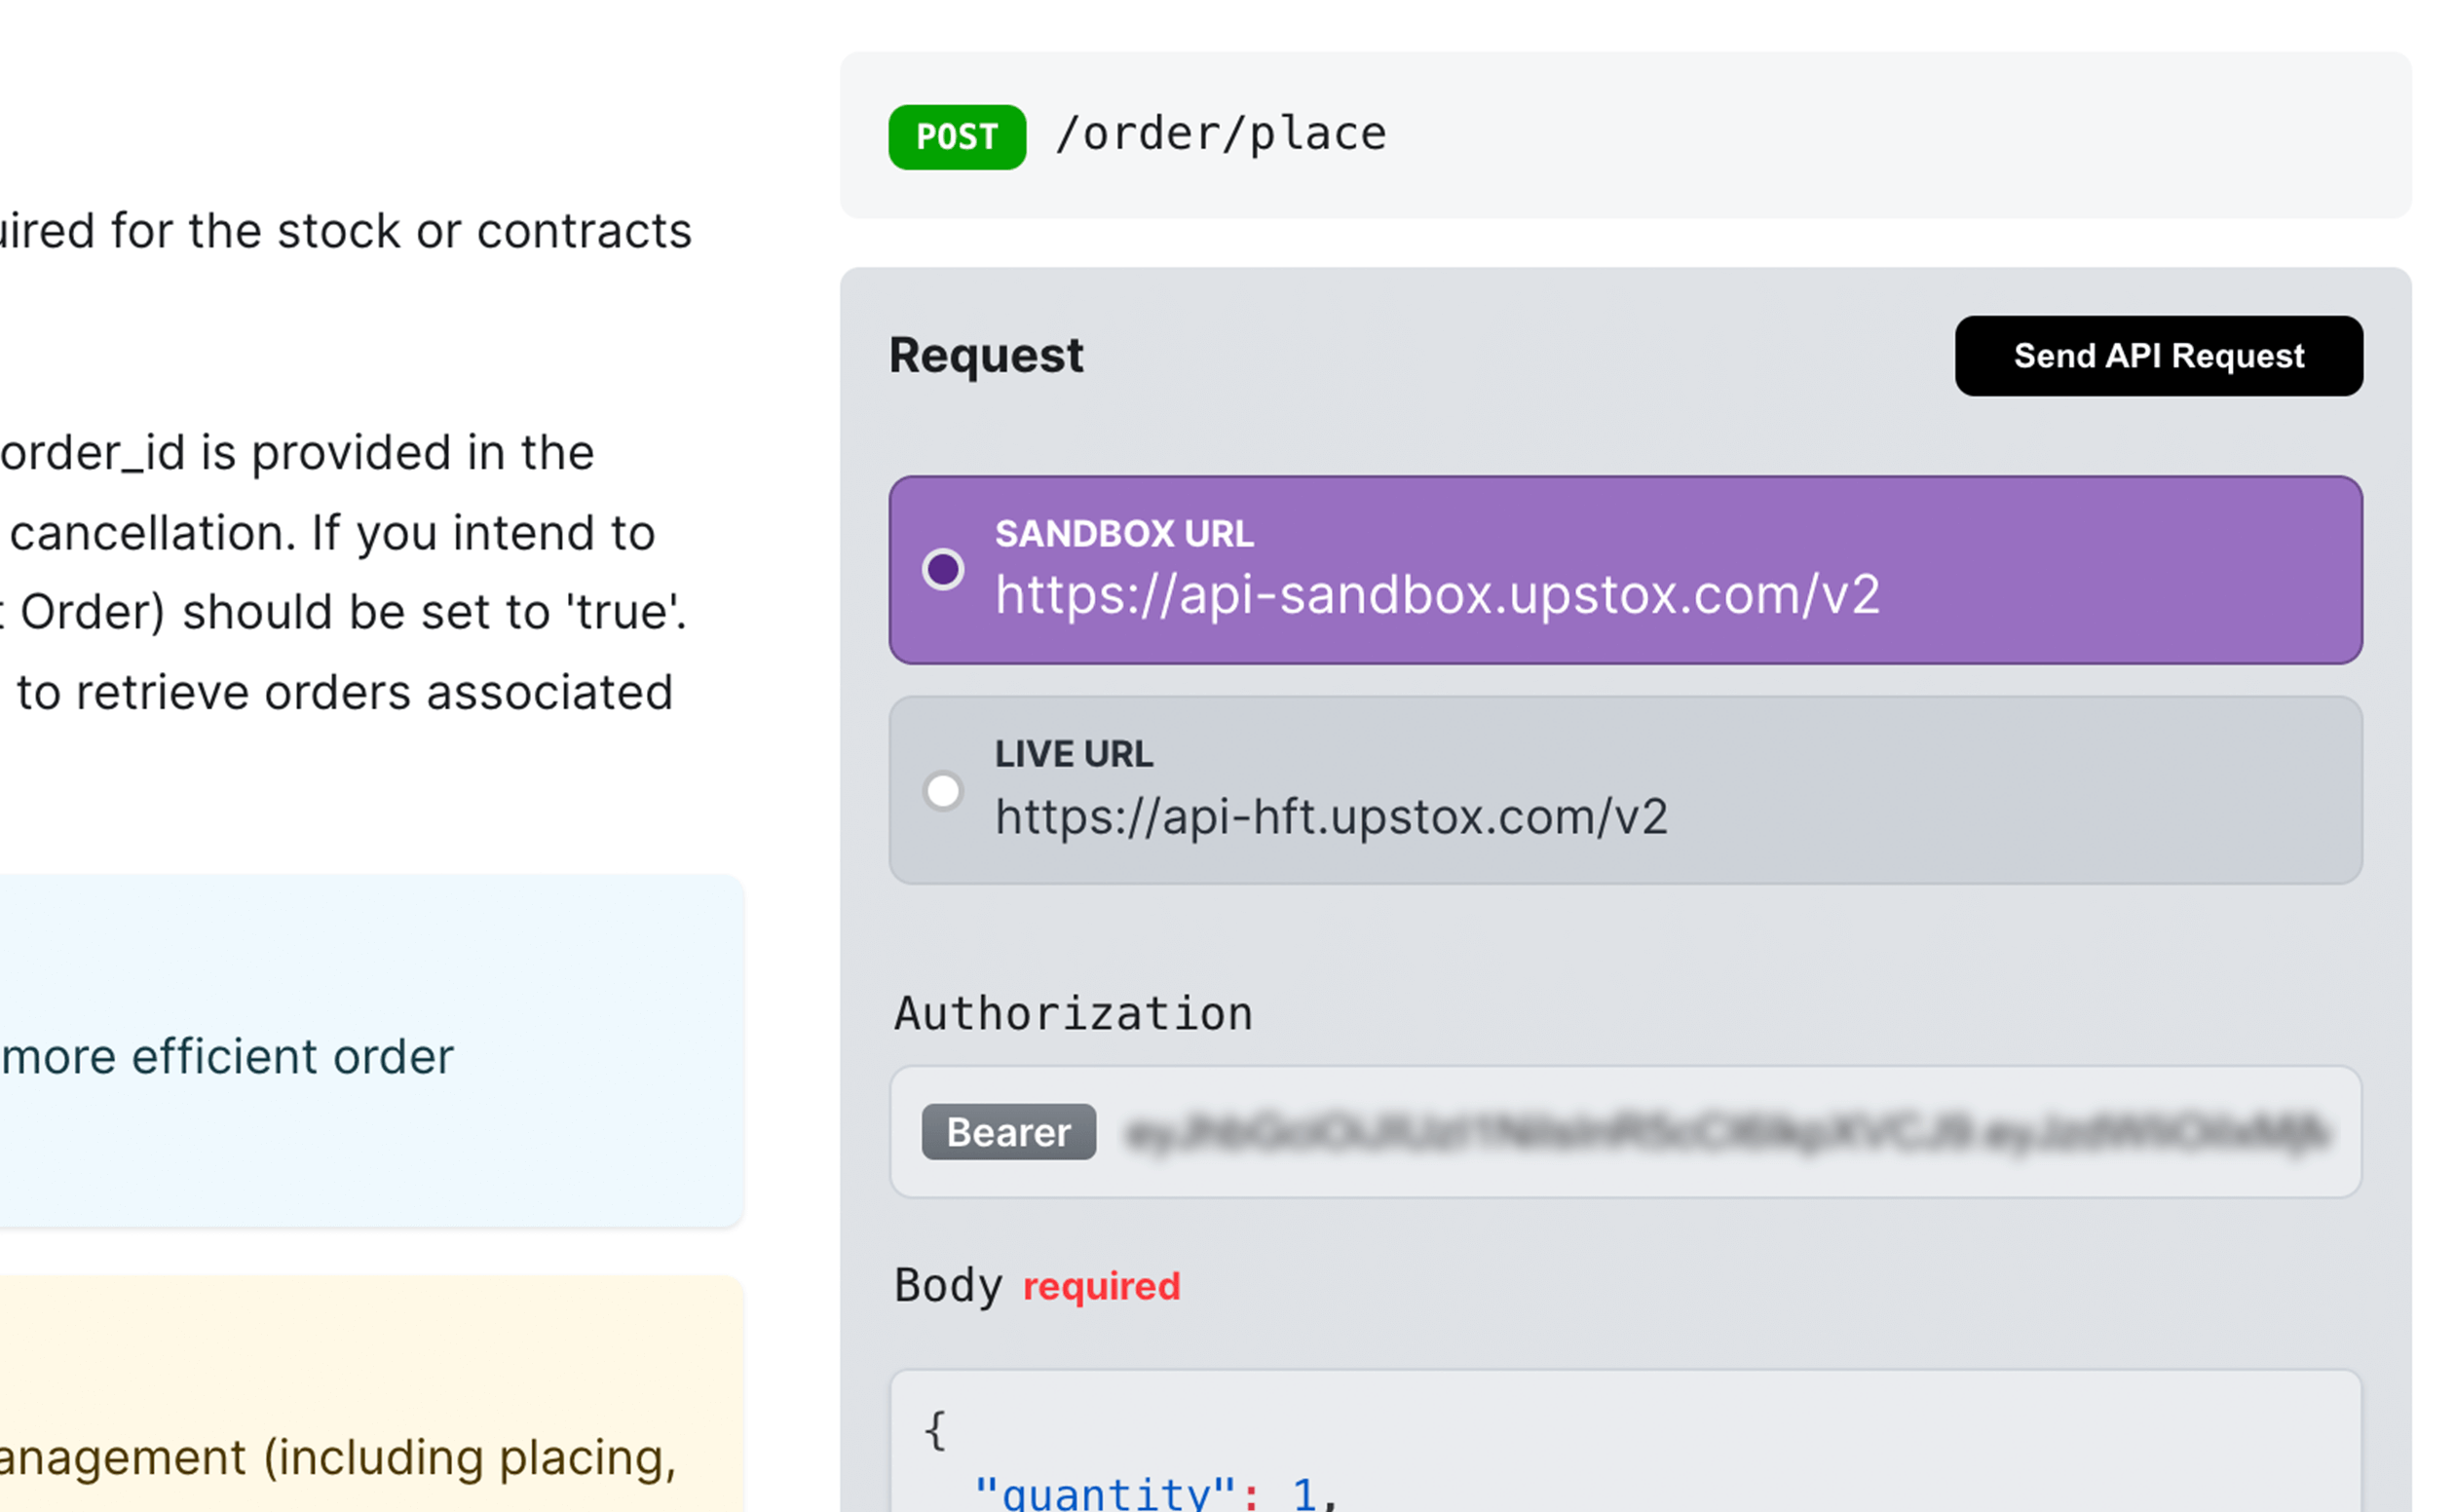
Check the Request Setup - A section with request-related fields will be present, often pre-filled with a sample payload, if applicable. Enter your sandbox token, generated as described in the previous sections, and click the 'Send API Request' button to proceed.
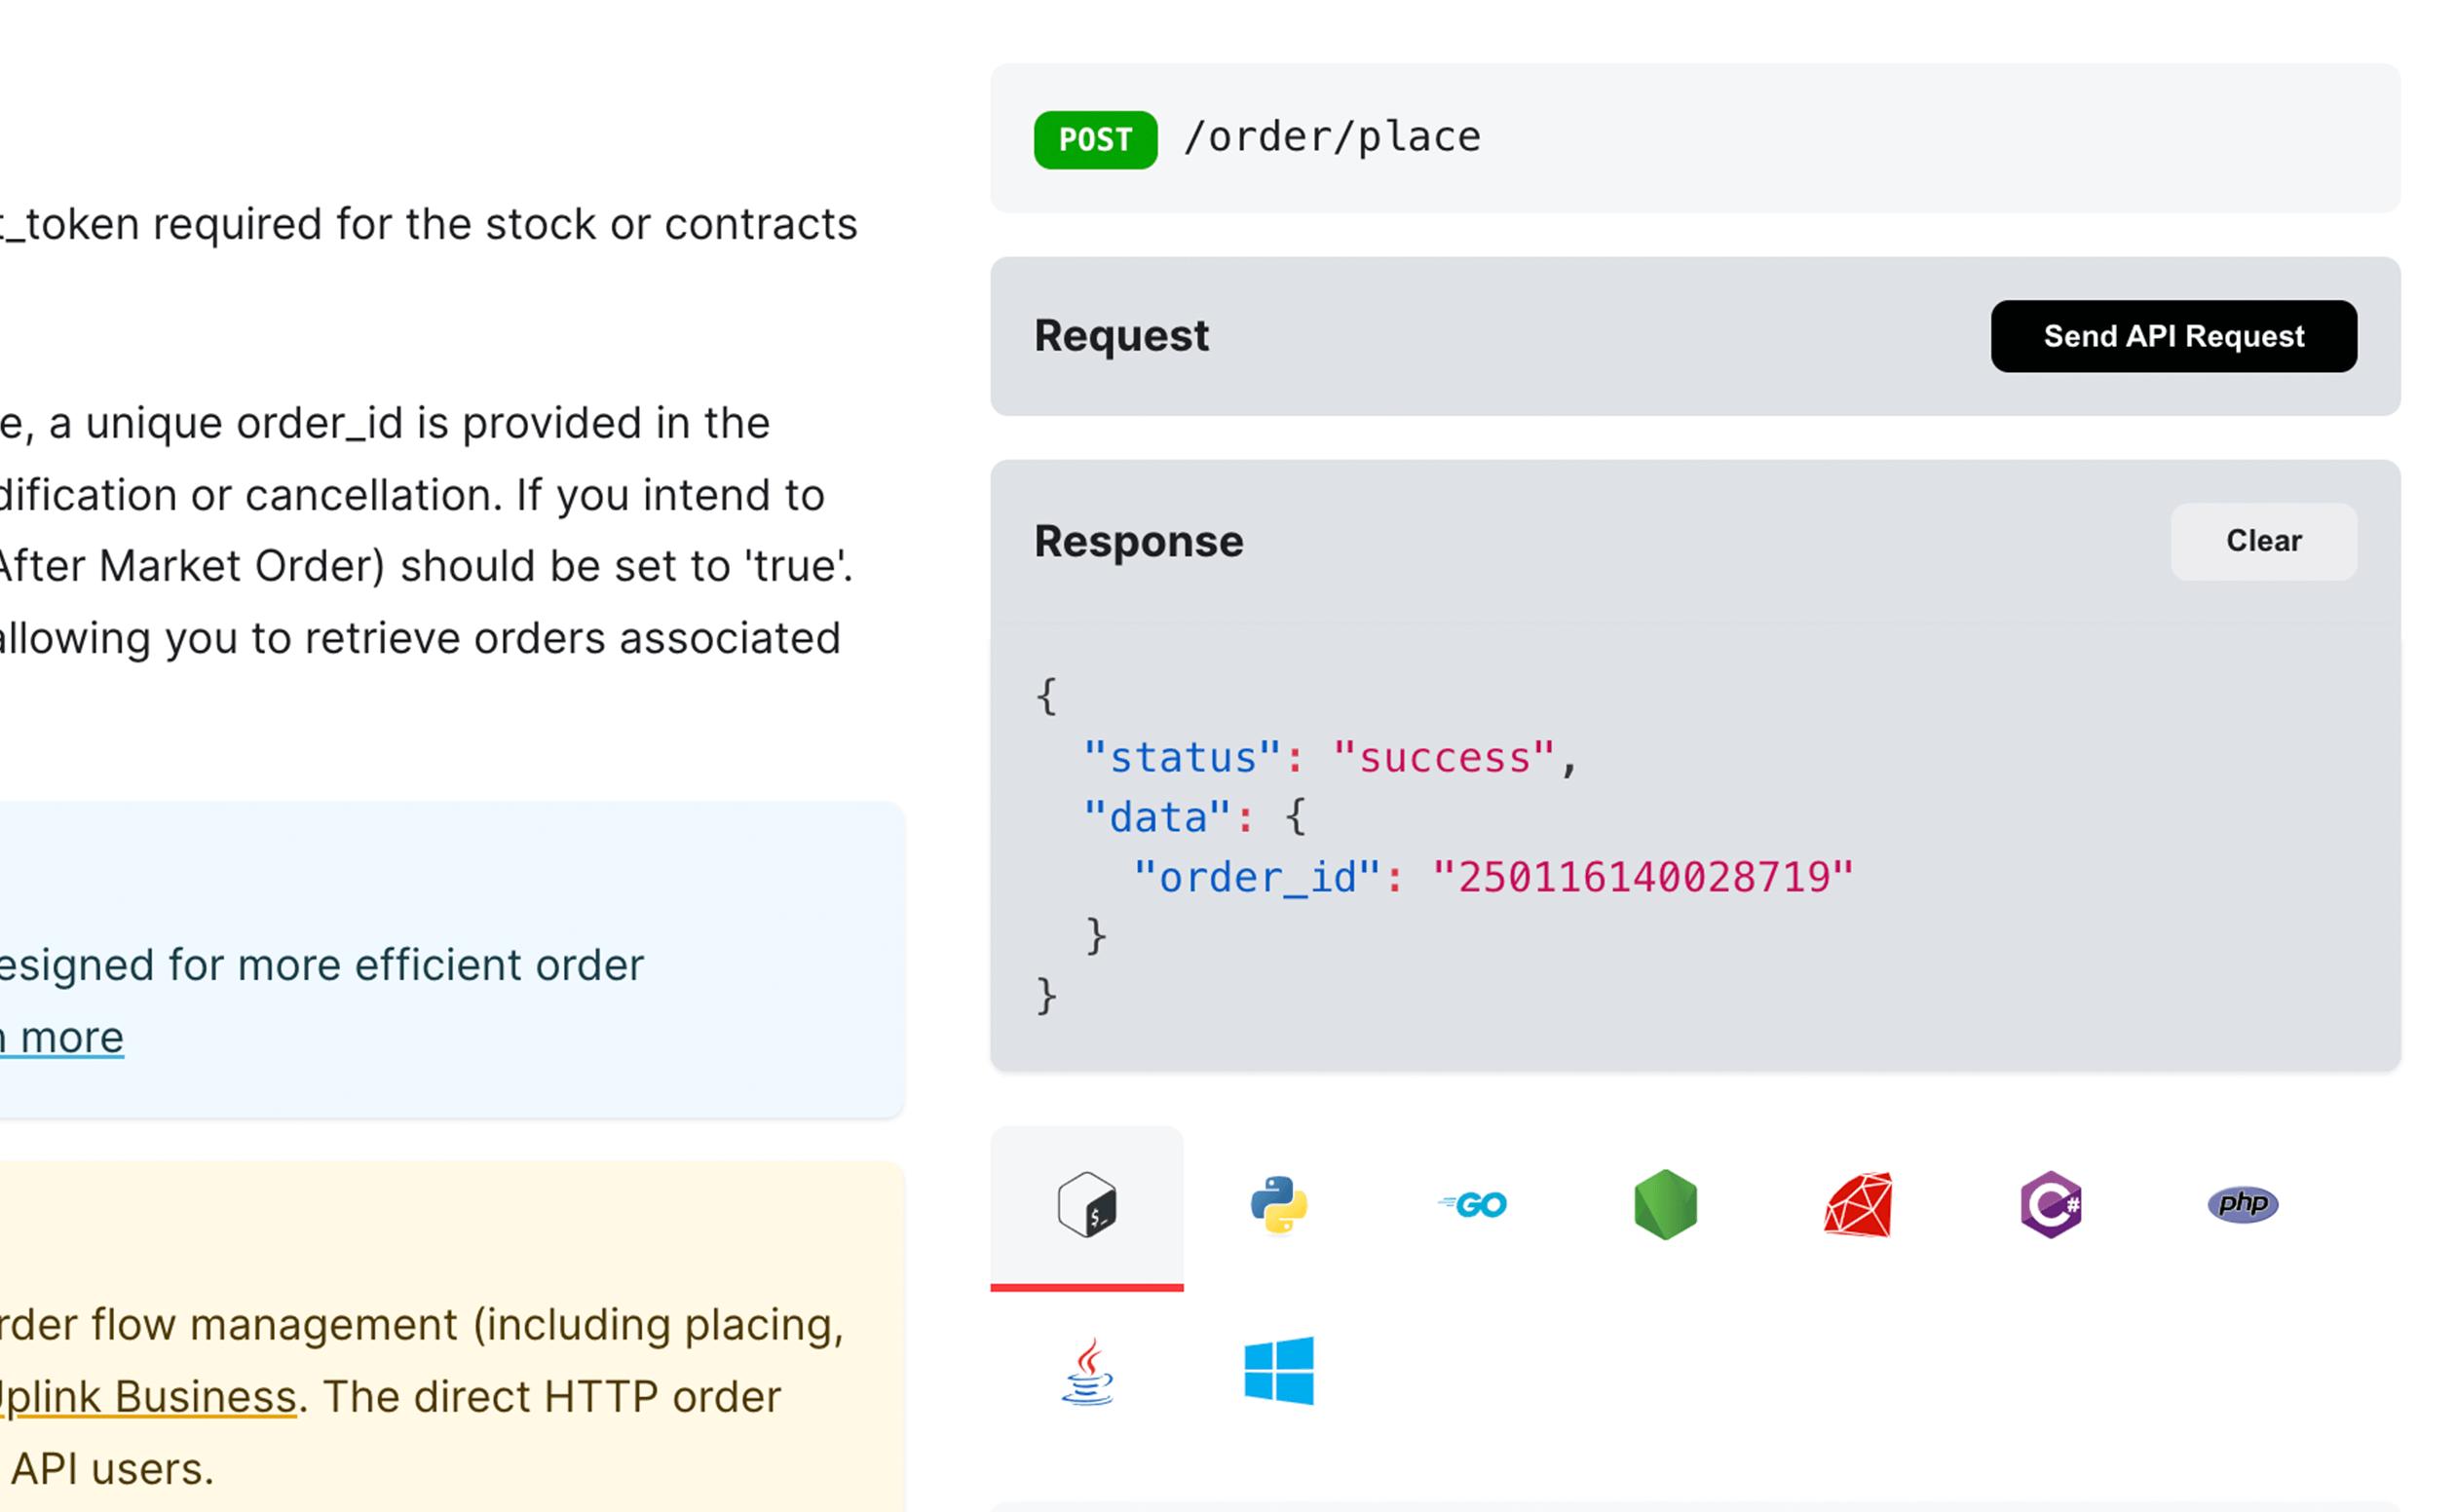
Review the API Response - Once executed, the response section will appear, showing the data received from the API. This is how you can confirm that the sandbox API is functioning as expected.
Sandbox enabled APIs
To facilitate easy navigation, we have listed APIs with sandbox capabilities within our documentation or developer portal.